

You’ve learned the fundamentals of hacking, but theory is useless without practice. You’re ready to start breaking things, but you know that aiming your tools at real websites will land you in serious legal trouble. The critical question every aspiring ethical hacker faces is: “How do I practice my skills safely and legally?” The answer is a home penetration testing lab.
While many guides say “use VMs,” they often fail to provide a complete architectural blueprint. They don’t explain how to network them, how to isolate them, or how to build a realistic environment that mimics a real corporate network. This is that guide.
“A home lab is your personal flight simulator. It’s where you can crash, burn, and learn to fly without any real-world consequences. Every hour spent in your lab is an hour of experience you can put on your resume.”
The Lab Blueprint – Your Digital Sandbox
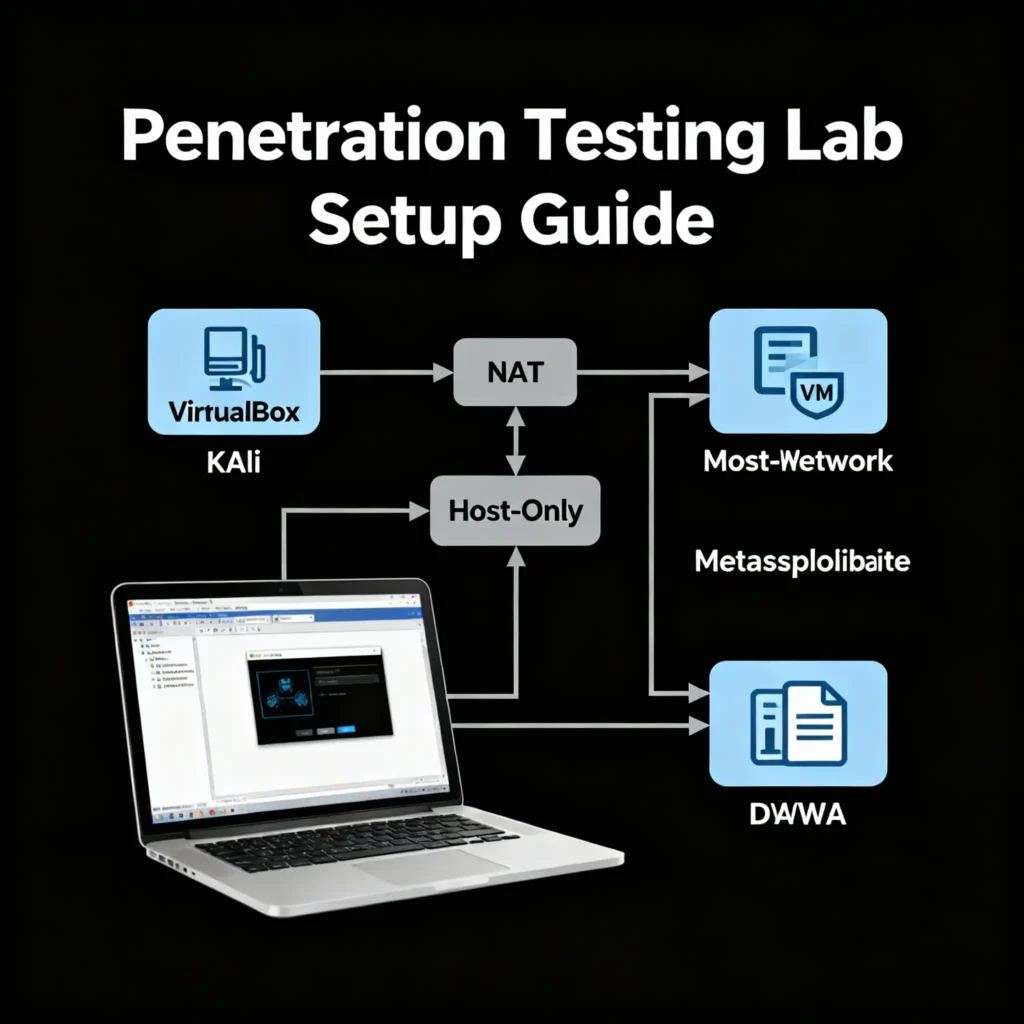
Before we install anything, you must understand the architecture. A pentesting lab is not just a collection of random virtual machines (VMs); it’s an isolated network ecosystem. Your lab will consist of three core components:
- The Hypervisor: This is the software that runs on your main computer and allows you to create and manage multiple VMs. It is the foundation of your entire lab.
- The Attacker Machine: This is your command and control center. It’s a VM running a specialized penetration testing operating system, like Kali Linux, equipped with all the tools you’ll need.
- The Target Machines: These are intentionally vulnerable VMs that you will practice attacking. They can range from simple, single-purpose web servers to complex environments that simulate a full corporate network with Active Directory.
| Component | Role | Recommended Software | Cost |
|---|---|---|---|
| Hypervisor | Manages all virtual machines | VirtualBox | Free |
| Attacker VM | Your hacking operating system | Kali Linux | Free |
| Target VMs | Your practice dummies | Metasploitable 2, OWASP BWA, VulnHub machines | Free |
The Foundation – Hardware and Hypervisor Setup
This is the physical and digital foundation of your lab. Getting this right is critical for a smooth and safe experience.
Hardware Requirements: Don’t Underestimate RAM
While you can start with less, a frustratingly slow lab will kill your motivation. For a good experience running 2-3 VMs simultaneously, here are the realistic minimum requirements:
- CPU: A modern processor with at least 4 cores (Intel i5/i7 or AMD Ryzen 5/7).
- RAM: 16GB is the real-world minimum. 8GB is possible but you will experience significant slowdowns. 32GB is ideal.
- Storage: A Solid State Drive (SSD) is highly recommended for speed. You’ll need at least 100GB of free space for your VMs.
Step 1: Install Your Hypervisor (VirtualBox)
We will use Oracle’s VirtualBox because it is free, powerful, and works on Windows, Mac, and Linux.
- Go to the official
virtualbox.orgwebsite. - Download the installer for your operating system and the “VirtualBox Extension Pack.”
- Run the installer for VirtualBox, using all the default settings.
- Once installed, open VirtualBox and go to
File -> Tools -> Extension Pack Managerand install the Extension Pack you downloaded. This enables important features like USB support.
Step 2: Configure Your Virtual Networks (CRITICAL STEP)
This is the most important step for creating a safe, isolated lab. We will create two virtual networks:
- A NAT Network: This network will give your Attacker VM (Kali Linux) access to the internet to download updates and tools. Your target machines will not be connected to this.
- A Host-Only Network: This is your private, internal lab network. It allows your VMs to talk to each other, but it is completely isolated from your home network and the internet. This is where your targets will live.
How to Configure the Networks in VirtualBox:
- In VirtualBox, go to
File -> Tools -> Network Manager. - Click on the “NAT Networks” tab. Click “Create”. A new network called
NatNetworkwill appear. You don’t need to change any of its settings. - Click on the “Host-only Networks” tab. Click “Create”. A new network will be created (likely named
vboxnet0). - Select the new host-only network and click “Properties.”
- Under the “Adapter” tab, ensure the IPv4 address is set (e.g.,
192.168.56.1). - Click on the “DHCP Server” tab. Uncheck “Enable Server.” We will manually assign IP addresses to our targets to keep things stable and predictable.
[A simple diagram showing two boxes. The first box, labeled “NAT Network,” connects a Kali Linux VM icon to a cloud icon labeled “Internet.” The second box, labeled “Host-Only Network,” shows the Kali Linux icon connected to several other server icons (Metasploitable, Windows Server), with a large red “X” blocking any connection to the Internet cloud.]
You have now built the foundation of your lab: a hypervisor with a secure, two-network configuration. You are ready to start adding your machines.
Building Your Arsenal – The Attacker Machine
Your Kali Linux VM is your sword. It’s the machine from which you will launch all your attacks.
Step 1: Download and Import Kali Linux
The easiest way to install Kali is by using the pre-built VirtualBox image.
- Go to the official Kali Linux website (
kali.org) and navigate to the “Get Kali” -> “Virtual Machines” section. - Download the image for “VirtualBox.” It will be a large
.ovafile. - In VirtualBox, go to
File -> Import Appliance. - Select the
.ovafile you downloaded and follow the prompts. VirtualBox will automatically create the VM with recommended settings.
Step 2: Configure the Kali VM’s Network and Hardware
Before you start the VM for the first time, we need to connect it to our two networks.
- Select your new Kali VM in VirtualBox and click “Settings.”
- Go to the “System” tab. Increase the “Base Memory” to at least 4096 MB (4GB).
- Go to the “Network” tab.
- Adapter 1: Ensure it is “Enabled” and set “Attached to:” to “NAT Network.” This is its internet connection.
- Adapter 2: Click the “Adapter 2” tab. Check “Enable Network Adapter.” Set “Attached to:” to “Host-only Adapter.” Make sure the name matches the host-only network you created earlier (e.g.,
vboxnet0).
Step 3: First Boot and Update
Start your Kali VM. The default credentials for the VirtualBox image are usually kali / kali. Once logged in, open a terminal and run the following commands to update your system:
bashsudo apt update
sudo apt full-upgrade -y
This process can take a while. Once it’s complete, take a snapshot of your VM (Machine -> Take Snapshot). This saves the current state of the machine, allowing you to instantly revert back to this clean, updated state if you ever break something.
You now have a fully functional, updated, and networked attacker machine, ready to deploy. This machine is your starting point for every exercise in our complete ethical hacking guide.
STOP: Read This Before Proceeding
The target virtual machines and containers you are about to install are intentionally vulnerable. They are full of security holes by design. It is absolutely critical that they are only connected to your isolated Host-Only Network or a custom Docker network and are never exposed to the internet. Failure to do so could result in your lab being compromised by real-world attackers.
Now, it’s time to give your attacker machine something to attack. In this section, we will populate your isolated lab network with a variety of vulnerable target machines. We will then verify that everything is working correctly by launching your first enumeration and exploitation sequence. This is the moment your lab comes to life.
Populating Your Lab – The Target Machines
A good lab has a variety of targets with different operating systems and vulnerabilities. We will start with two of the most popular and foundational targets for beginners.
Target 1: Metasploitable 2 (The Classic Sandbox)
Metasploitable 2 is an Ubuntu Linux virtual machine that was intentionally loaded with a huge number of security holes. It is the perfect starting point for learning about network service exploitation.
Step 1: Download and Import Metasploitable 2
- Metasploitable 2 is officially hosted by Rapid7. Search for “Metasploitable 2 download” to find the official link. It will be a
.zipfile. - Unzip the downloaded file. Inside, you will find a
.vmdkfile and other configuration files. This is a pre-made virtual machine, but we need to create a VM for it in VirtualBox. - In VirtualBox, click “New.”
- Name:
Metasploitable2 - Type:
Linux - Version:
Ubuntu (64-bit)
- Name:
- Assign it at least 1024 MB (1GB) of RAM.
- On the “Hard disk” screen, select “Use an existing virtual hard disk file.” Click the folder icon, click “Add,” and navigate to the
.vmdkfile you unzipped. Select it and click “Choose,” then “Create.”
Step 2: Configure Metasploitable 2’s Network
This is the most important step for safety.
- Select your new
Metasploitable2VM and click “Settings.” - Go to the “Network” tab.
- For Adapter 1, ensure it is “Enabled” and set “Attached to:” to “Host-only Adapter.”
- Go to the “Adapter 2” tab and ensure the adapter is NOT enabled. This machine should have no way to access the internet.
Target 2: OWASP Broken Web Apps (BWA) Project (Web App Practice)
While Metasploitable 2 is great for network services, you need a dedicated target for practicing web application attacks like the ones found in our SQL Injection Guide. The OWASP BWA project is a single virtual machine that comes pre-loaded with dozens of different vulnerable web applications, including DVWA and WebGoat.
Step 1: Download and Import OWASP BWA
- Search for “OWASP BWA download” and find the official project page, likely on SourceForge.
- Download the
.ovafile. This is a pre-packaged appliance, just like Kali Linux. - In VirtualBox, go to
File -> Import Appliance. - Select the OWASP BWA
.ovafile you downloaded and follow the prompts to import it.
Step 2: Configure OWASP BWA’s Network
The process is identical to Metasploitable 2. This machine must also be isolated.
- After importing, select the
OWASP BWAVM and click “Settings.” - Go to the “Network” tab.
- Set Adapter 1 to “Host-only Adapter.”
- Ensure no other network adapters are enabled.
You now have a lab with one attacker machine (Kali) and two different target machines (Metasploitable 2 and OWASP BWA), all communicating on a private, isolated network.
5: Alternative Lab Setup with Docker
For many web application and service-based targets, using Docker is a more lightweight and faster alternative to running a full virtual machine. Docker uses containers, which share the host system’s kernel, making them much less resource-intensive. You can run these commands from your Kali Linux VM after installing Docker (sudo apt install docker.io).
Step 1: Create a Custom Docker Network for Isolation
First, create an isolated network for your containers to live in. This prevents them from being directly exposed.
bashsudo docker network create pentest-lab-net
Step 2: Pull and Run Vulnerable Containers
Here are the commands to pull and run some of the most popular vulnerable applications as Docker containers.
- OWASP Juice Shop (Modern Web App Hacking)bash
# Pull the latest image from Docker Hub sudo docker pull bkimminich/juice-shop # Run the container, connecting it to your custom network and mapping port 3000 sudo docker run --rm -d --net pentest-lab-net -p 3000:3000 --name juice-shop bkimminich/juice-shop - Damn Vulnerable Web App (DVWA) (Classic Web Hacking)bash
# Pull the image sudo docker pull vulnerables/web-dvwa # Run the container, mapping port 80 sudo docker run --rm -d --net pentest-lab-net -p 8080:80 --name dvwa vulnerables/web-dvwaYou would then access this athttp://<Kali_VM_IP>:8080 - Metasploitable 2 (as a container)bash
# Pull the containerized version sudo docker pull tleemcjr/metasploitable2 # Run the container, exposing all its vulnerable ports to the host sudo docker run --rm -it --net pentest-lab-net --name metasploitable-container -d tleemcjr/metasploitable2 /bin/bash
Step 3: Managing Your Docker Lab
- List Running Containers:
sudo docker ps - Stop a Container:
sudo docker stop <container_name_or_id>(e.g.,sudo docker stop juice-shop) - View Logs of a Container:
sudo docker logs <container_name_or_id> - Remove a Stopped Container:
sudo docker rm <container_name_or_id> - Remove a Docker Image:
sudo docker rmi <image_id>
Using Docker is an excellent way to quickly spin up and tear down targets without the overhead of managing full virtual machines, making it perfect for focused practice sessions.
Bringing the Lab to Life – Your First Hack
It’s time to verify that everything is working. We will perform a simple, classic penetration testing workflow: discover, enumerate, and exploit.
Step 1: Boot the Lab and Find Your Targets
- Start your
Kali LinuxVM. - Start your
Metasploitable2VM. - Once both are booted, log in to Metasploitable 2. The default credentials are
msfadmin/msfadmin. - In the Metasploitable 2 terminal, type
ifconfigto find its IP address. It will likely be something like192.168.56.x. Note this address down.
Step 2: Enumerate with Nmap
Now, switch to your Kali Linux VM. Your goal is to use Nmap to find the open ports and services on your Metasploitable 2 target.
- Open a terminal in Kali.
- Run a simple Nmap scan against the IP address you noted down. Let’s start with an aggressive scan to get a lot of information:bash
nmap -A 192.168.56.101(Replace192.168.56.101with the actual IP of your Metasploitable 2 VM) - Analyze the output. You should see a huge list of open ports. Look for something interesting, like port
21(vsftpd 2.3.4), port22(OpenSSH), or port80(Apache httpd).
Step 3: Exploit with Metasploit
The Nmap scan on Metasploitable 2 reveals a very famous vulnerability: the vsftpd 2.3.4 service has a backdoor. Let’s exploit it using the Metasploit Framework.
- In your Kali terminal, start the Metasploit Framework console by typing:bash
msfconsole - Search for the exploit:bash
search vsftpd - You should see an exploit named
exploit/unix/ftp/vsftpd_234_backdoor. Use it:bashuse exploit/unix/ftp/vsftpd_234_backdoor - Set the target IP address:bash
set RHOSTS 192.168.56.101 - Launch the exploit:bash
exploit
Success! If everything worked, you should see a message saying “Command shell session 1 opened.” You now have a root shell on the target machine. You can type whoami and it should return root. You have successfully compromised your first machine in a safe and controlled lab environment.
Step 4: The Importance of Snapshots
Now that you’ve hacked the machine, what’s next? This is where snapshots become invaluable.
- Before you exploit a machine, take a snapshot. This saves its “clean” state.
- After you are done practicing, revert the machine to the snapshot. This instantly undoes all your changes and returns the machine to its original, vulnerable state, ready for you to practice a different attack vector.
Conclusion: Your Hacking Dojo is Open
Congratulations. You have successfully built a functional, safe, and repeatable penetration testing home lab. You have an attacker machine, vulnerable targets, and a secure, isolated network. You have also completed your first full attack chain, from reconnaissance to exploitation.
This lab is now your personal dojo. It’s the environment where you will spend hundreds of hours honing your skills, practicing techniques from online courses, and preparing for certifications. The more time you spend here, the more prepared you will be for the real world. Keep adding new vulnerable machines from VulnHub, keep experimenting with the tools you learn about, and never stop being curious. Your journey as a hands-on ethical hacker has truly begun.
FAQ‘s
The Basics & Hardware
- Why do I need a home lab? Why can’t I just use online platforms?
Online platforms like Hack The Box are essential, but a home lab gives you complete control. You can analyze network traffic, understand how exploits work at a packet level, and practice post-exploitation and lateral movement in a way that’s not possible on most shared platforms. - What is a “hypervisor”?
It’s the software that creates and runs virtual machines (VMs). VirtualBox and VMware Workstation are Type 2 hypervisors, meaning they run on top of your existing operating system (like Windows or macOS).webasha - Is VirtualBox or VMware better for a pentesting lab?
Both are excellent. VirtualBox is free and powerful, making it the best choice for beginners. VMware Workstation is a paid product that some professionals prefer for its performance and advanced features, but it’s not necessary to start.webasha - What are the absolute minimum hardware specs I need?
You can technically get by with an i5 CPU and 8GB of RAM, but it will be a frustratingly slow experience. 16GB of RAM is the realistic minimum for running a Kali VM and one or two target VMs smoothly.linkedin - Is an SSD necessary?
It’s not strictly necessary, but it is highly recommended. Running multiple operating systems simultaneously is very disk-intensive. An SSD will make your lab significantly faster and more responsive compared to a traditional HDD. - Can I build a lab on my laptop?
Yes, absolutely. Most modern laptops with 16GB+ of RAM are perfectly capable of hosting a beginner-to-intermediate pentesting lab. - What about a dedicated server or a cloud lab?
These are more advanced options. A dedicated home server (like an old PC or an Intel NUC) is great for running a larger, persistent lab. A cloud lab (in AWS, Azure, etc.) offers incredible flexibility but comes with ongoing costs and the risk of misconfiguration leading to a huge bill. Stick with a local lab on your PC to start.webasha - Will running a lab slow down my main computer?
Yes, while the VMs are running, they will consume a significant amount of your CPU, RAM, and disk resources. When the VMs are shut down, your computer’s performance will return to normal. - How much disk space do I need?
Plan for at least 100GB of free space. A Kali Linux VM will take up around 40GB, and each target VM will take anywhere from 5GB to 20GB. - Do I need a special graphics card (GPU)?
No. For 99% of penetration testing, a powerful GPU is not needed. The only major exception is advanced password cracking with tools like Hashcat, but this is not a beginner topic.
Networking & Isolation
- What is the most important part of setting up a lab safely?
Network isolation. You must ensure that your vulnerable target machines cannot be accessed from the internet. Using a “Host-Only” network in VirtualBox is the key to achieving this. - What’s the difference between NAT, Host-Only, and Bridged networking?
- Bridged: The VM gets its own IP address on your home network, just like another physical computer. Do not use this for targets.
- NAT: The VM shares your host computer’s IP address to access the internet. Good for your attacker machine to get updates.
- Host-Only: Creates a private, internal network just for your VMs and your host computer. It cannot access the internet. This is the safe network for your targets.cybrary
- Why does the Kali VM need two network adapters?
- Adapter 1 (NAT Network): To access the internet for updates and to download tools.
- Adapter 2 (Host-Only): To communicate with the vulnerable target VMs on your private lab network.
- Why should my target VMs only have one Host-Only adapter?
To ensure they are completely isolated. Giving a vulnerable machine an internet connection is like putting a target on your home network for real-world attackers to find and exploit.webasha - My Kali VM can’t ping my target VM. What’s wrong?
This is the most common setup problem. Check the following:- Are both VMs running?
- Are they both connected to the same Host-Only network in their VirtualBox settings?
- Check the IP addresses of both machines (
ip ain Linux) to ensure they are on the same subnet (e.g.,192.168.56.101and192.168.56.102). - Is there a firewall on the target VM blocking pings? (This is part of the challenge sometimes!)
- What IP addresses should I use for my lab?
The default192.168.56.xrange for the VirtualBox Host-Only network is perfectly fine. It’s a private IP range and won’t conflict with your home network. - Can I use Docker instead of full VMs?
Yes, for many web application targets (like OWASP Juice Shop or DVWA), Docker is a fantastic, lightweight alternative. However, for practicing full operating system exploitation and privilege escalation, full VMs like Metasploitable are often better. - How do I isolate Docker containers?
By creating a custom Docker network (docker network create my-lab) and attaching all your lab containers to that network. Do not attach them to the default “bridge” or “host” networks. - What is a “VLAN”? Do I need one for my home lab?
A VLAN (Virtual LAN) is a way to create multiple, separate logical networks on a single physical network. You do not need to worry about VLANs for a basic home lab, but it’s a concept you’ll encounter in corporate networking. - Can I access my lab VMs from another computer on my home network?
Not if you’ve configured the Host-Only network correctly. That network is designed to be accessible only from the host computer running VirtualBox.
The Machines (Attacker & Targets)
- Why Kali Linux? Why not Parrot OS or BlackArch?
Kali Linux is the industry standard and has the most documentation and community support, making it the best choice for beginners. Parrot OS is a great alternative. BlackArch is for more advanced users. - What is “Metasploitable”?
It’s an intentionally vulnerable Linux VM created by Rapid7 (the makers of Metasploit) specifically for practicing penetration testing. It’s loaded with old, vulnerable services.webasha - What is “OWASP BWA”?
The OWASP Broken Web Apps project is a VM that contains a collection of dozens of vulnerable web applications. It’s an all-in-one target for practicing web-specific attacks like SQL Injection and XSS.webasha - Where can I find more vulnerable machines to practice on?
VulnHub is a massive, free repository of user-submitted vulnerable VMs. You can download and add them to your lab to practice against a huge variety of targets. - My Metasploitable VM login is
msfadmin/msfadmin, but what is the root password?
The root password for Metasploitable 2 is alsomsfadmin. You can usesudo -ito become root. - Should I update my target machines?
No! The vulnerabilities are the reason they exist. “Updating” or “patching” them would remove the very security holes you are trying to practice exploiting. - Should I update my Kali Linux VM?
Yes, always. Your attacker machine should always be kept up-to-date to ensure you have the latest versions of your tools and security patches for your own OS. Runsudo apt update && sudo apt full-upgrade -yregularly. - What are “VMware/VirtualBox Guest Additions”?
It’s a package of drivers and utilities you install inside the guest VM. It enables features like a shared clipboard between your host and guest, dynamic screen resizing, and file sharing. You should always install it in your Kali VM.linkedin - What is a “snapshot” and why is it so important?
A snapshot saves the exact state of a VM at a specific point in time. It allows you to instantly revert the machine back to that state. This is critical for practice, as you can exploit a machine and then revert it to its “clean” state to try a different attack, without having to reinstall it.webasha - When should I take snapshots?
- Take a “Clean” snapshot of your Kali VM immediately after a fresh install and update.
- Take a “Baseline” snapshot of every target machine before you ever attack it.
- You can also take snapshots mid-attack if you’re about to try something risky and might want to undo it.
Common Problems & Troubleshooting
- My VM is running very slowly. How can I fix it?
- Allocate more RAM to the VM (at least 4GB for Kali).
- Allocate more CPU cores to the VM (2-4 cores if you have them).
- Ensure your VMs are stored on an SSD.
- Close unnecessary applications on your host computer.
- I imported a VM, but it says “VT-x is disabled.” What does this mean?
This means virtualization technology is disabled in your computer’s BIOS/UEFI. You will need to reboot your computer, enter the BIOS/UEFI settings, and find an option for “Intel Virtualization Technology (VT-x)” or “AMD-V” and enable it. - I can’t get an IP address on my Kali VM.
Check that the network adapter is enabled in the VM settings and is attached to the correct network (NAT Network for internet, Host-Only for the lab). Inside Kali, you can try runningsudo dhclient -rto release the current IP andsudo dhclientto request a new one. - I forgot the password to my Kali VM.
If you’re using the standard image, the default iskali/kali. If you changed it and forgot, it’s often faster to just delete the VM and re-import the original appliance file. - Metasploit says “Exploit completed, but no session was created.” What happened?
This is a very common issue. It means the exploit code ran, but the payload failed to execute. The most common reasons are:- A firewall on the target is blocking the payload’s connection.
- You are using the wrong payload for the target’s architecture (e.g., a 64-bit payload for a 32-bit system).
- The exploit is unreliable.
- My Kali VM doesn’t have internet access.
Ensure its Adapter 1 is set to “NAT Network.” Also, check that your host computer has a working internet connection. - Can my lab get infected with a real virus?
Your vulnerable target machines are full of old software, but the risk of a “wild” virus infecting them is near zero as long as they are properly isolated on the Host-Only network with no internet access. - How do I share files between my host machine and my Kali VM?
The easiest way is to enable the “Shared Clipboard” and “Drag’n’Drop” features (set to Bidirectional) in the VM’s settings, which requires Guest Additions to be installed. For larger files, you can set up a “Shared Folder.” - Is it better to use a Windows or a Linux machine as my attacker VM?
For pentesting, a Linux machine (specifically Kali or Parrot) is the standard. While you can install some tools on Windows, the ecosystem is built around Linux. - The terminal is scary. Do I have to use the command line?
Yes. The command line is the most powerful and efficient way to interact with a system and use hacking tools. Graphical interfaces are often limited. Learning to be comfortable in the terminal is a non-negotiable skill for an ethical hacker.
Expanding Your Lab
- How do I practice hacking Windows?
You can download free trial versions of Windows Server from the Microsoft Evaluation Center. Install one as a VM on your Host-Only network. You can then practice Active Directory attacks. - What is Active Directory (AD)?
It’s Microsoft’s directory service, used to manage users, computers, and policies in most corporate networks. Learning to attack AD is a critical skill for any professional pentester. - How can I set up a vulnerable Active Directory lab?
This is an advanced topic. There are many online guides for setting up a “Vulnerable AD” lab using multiple Windows Server VMs. Projects like “Throwback” on GitHub provide automated scripts to build one. - Should I have a firewall VM in my lab?
For an advanced lab, yes. You can install an open-source firewall like pfSense as a VM to sit between different network segments. This allows you to practice firewall evasion techniques. - What about a SIEM for blue team practice?
Excellent idea. You can set up a free SIEM like Security Onion or the ELK Stack as a VM in your lab. Attack your targets with Kali, and then switch to the SIEM to see what the attack looks like from a defender’s perspective. - What is “Infrastructure as Code” (IaC) for labs?
Tools like Vagrant and Ansible can be used to write scripts that automatically build and configure your entire lab. This makes your lab perfectly repeatable and easy to share or rebuild if something breaks.webasha - Can I use my lab to prepare for the OSCP?
Yes. Your home lab is an essential part of studying for the OSCP. You will use it to practice techniques on VulnHub machines that are similar in style to the OSCP exam machines. - My lab is running out of resources. What’s the next step?
Your options are to either upgrade the RAM and CPU in your host computer or to buy a separate, dedicated machine (like an old desktop or Intel NUC) to run as a headless server for your lab. - How do I save my lab setup?
You can export your configured VMs as.ovaappliance files from VirtualBox. This creates a single file backup of your machine that you can re-import later or on another computer. - What is the most common mistake beginners make when building a lab?
Spending too much time perfecting the lab setup and not enough time actually using it. Start simple with Kali and Metasploitable, get a few “wins,” and then gradually add complexity as your skills grow. The goal is to learn, not to become a professional lab administrator.
")